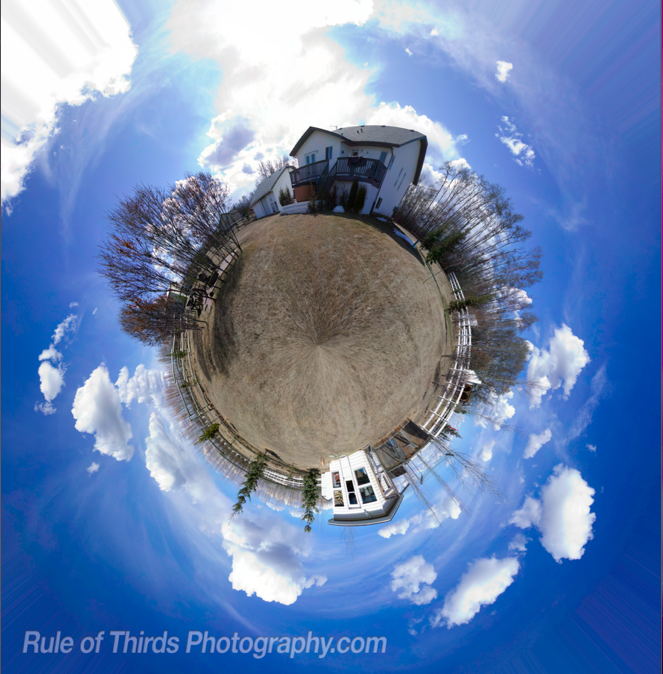
Hey guys, I have been waiting a long time to write about the “small planet” effect achieved in Photoshop. It’s one of my favourite effects and with the right photo you can have absolutely awesome results!
What do we need for a small planet effect?
- 1 x 360 degree photo (stitched in PS, PTGui Pro, AutoPano Pro)
- Photoshop

What panoramic’s work best? I have tried numerous different types of panoramic for this effect, from mountain ranges to some indoor panos – but outside panoramic with either trees, houses or signs work the best. You will want to have a nice blue sky with patchy clouds for the best result because it will create a more realistic atmosphere for your planet. Make sure your image has a lot of the ground in the shot to produce the planet, otherwise you’ll just have a tiny planet with huge buildings.
- Open Pano in Photoshop
- Image –> Image Size | Now change the width to the same as the height. It will mush your photo into one square box. Be sure to uncheck the constraint box.
- Image –> Rotate Canvas –> 180 degrees.
- Filter –> Distort –> Polar Coordinates | Press Enter. Nothing to adjust.
That’s it! You should now have a really cool looking mini planet! This can also be achieved using PTGui Pro with a complete 360 degree photo (including the entire floor) and change the projection to stereographic or “small planet”.

Thanks for the info.
what kind of photoshop u used on this one? its really amaing!
Thanks 🙂 I use Photoshop CS3.
Hi
Do you can explain more! I try, but nothing. May be I’m not good with PS.
I don’t see stereographic in PTGUI Pro.
Please, help me.
Your photo is very cool.
🙂
Everything OK.
Try, baby, try!
haha, good to hear you got thing’s to work out 🙂